Saturday, 16 May 2015

Here be Elephants

In late January I started weaving again in response to a plea for Linus blankets for CHEO. While the effort described here is not quite going to cut the mustard as a Linus blanket (I have a lot to learn about take up and shrinkage and general size planning for weaving, really, I have a lot to learn about weaving period, but more about that later) it has rather started me down a hopefully long and fruitful path of exploration and ultimately sharing.

I had made a successful blanket in Summer and Winter on the RH almost 5 years ago for a friend's new baby.  Said baby is now in Kindergarten and her Mum tells me the blanket is very well used, as a car blanket, a picnic blanket, floor mat, toy box cover and more.  I'm glad it isn't wrapped in tissue or hanging on a wall, such gifts are meant to be used.  I thought that experience might get me started on the right track.

Summer and Winter on the RH as I do it is really a tapestry technique. Anything I can graph in 2 colours I can weave.  For some reason I was hooked on the idea of an elephant blanket. I just needed a graph. Enter Stitch Sketch for iPad, an app that will import an image and convert it to a graph in as many or few colours as you want. Google images provided several likely candidates.  I finally settled on one that, with a bit of editing and fiddling, produced this graph:

Summer and Winter works in 4 thread units in the warp and 8 thread units in the weft. Each warp unit has 2 "tie down" threads and 2 pattern threads which alternate. On the RH the tie down threads are threaded in the holes of the heddles alternating between the two (i.e. tie down 1 or "x" goes in the front heddle hole, then a pattern thread in the slot, then tie down 2 or "y" in in the back heddle, then the 2nd pattern thread in the next slot).  The pattern threads are controlled in pairs
by a pick up stick.  For each row of the graph you pick up a pair of pattern threads for each filled in pattern square from behind the heddles. For this blanket I used 4/8 cotton for the warp threaded at 10dpi in 2 10 dpi heddles on my 32" Ashford RH loom.

In weaving there are several sequences you can use for the weft which each give a more or less different effect.  I chose x-y-y-x this time based on a sampler I made before I made the first baby blanket. This means that for each row of the graph after I made the pick up I wove the following shots:

1.  Both heddles up for tabby using navy 2/8 cotton (traditionally the tabby weft is usually the same weight as the warp but I wanted this tabby to be less noticeable and Judith said it would work - she's the S&W expert).
2.  Front heddle (x) up, back heddle down, stick forward to raise the pattern threads. Weave with 8/8 cotton pattern weft, in this case, elephant grey. The pattern weft is usually twice the diameter of the ground warp and weft.
3.  Both heddles down for tabby with 2/8 navy
4.  Back heddle (y) up, front heddle down, stick forward to raise the pattern threads with 8/8 grey
5.  Both heddles up for tabby with 2/8 navy
6.  Back heddle (y) up, front heddle down, stick forward to raise the pattern threads with 8/8 grey
7.  Both heddles down for tabby with 2/8 navy
8.  Front heddle (x) up, back heddle down, stick forward to raise the pattern threads with 8/8 grey

Check the graph, make a new pick up and repeat... 147 times. It isn't fast but it isn't really slow either once you catch the rhythm. I used Knit Companion (free version) on the iPad to keep my place on the graph. I used a safety pin with a cleverly designed stitch marker from Clover that holds a little piece of paper for keeping track of what block I was on. Every 10 rows I pinned the marker at the fell line and wrote the row number on the paper.  Every 5th row I put a safety pin in without the note. I leapfrogged the two markers as I went so I could easily count and see where I was.

The tag and marker are at the bottom right of the picture.  This is where I weave, sitting on a pillow on the floor with the loom against the fireplace ledge.  You can also see the iPad with the graph, and two sticks - I always leave the current stick in and use it to guide the next pick up.  When I'm sure I have it right I pull out the old stick.  The heddles are in down position so that the slot threads are on top both in front and behind the heddles.  They show up in pairs, in this case made even clearer because I changed colours every unit.


Since no post is complete without an appearance from the "helpers" here are Seven and Bandit, the newest members of the Helpy Helpers team:
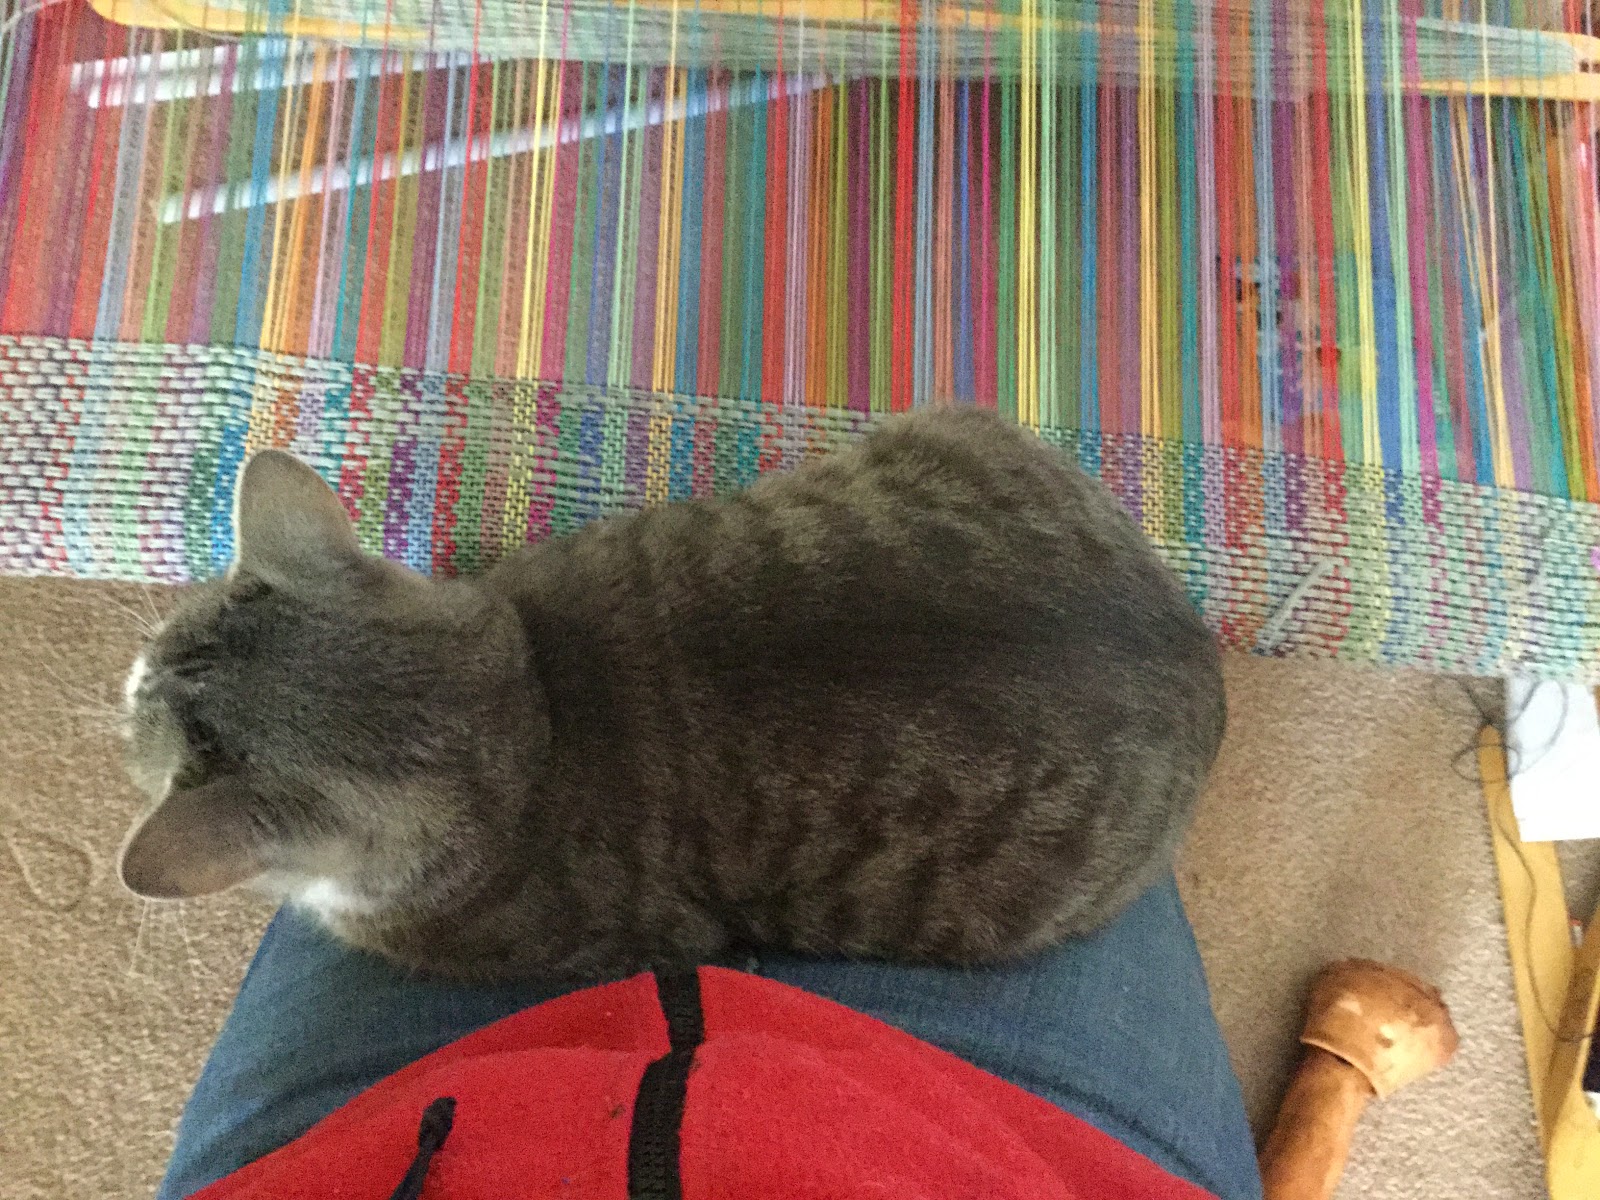


Yes, I can weave with a cat on my lap (well, Seven the extra small one, anyway, not sure Hobbes the extra large would fit), and yes, Bandit is UNDER the loom.  He was pretty good about not trying to catch the shuttle from there.

And here it is all washed and finished, except for trimming the fringe, which I think I like and isn't a problem if it's a wall hanging rather than a baby blanket.  I will spare you the pictures and commentary of fixing a tabby error I found after I took it off the loom for now.

Weaver's side up
Weaver's side down
It came out a bit smaller than I anticipated.  I was aiming for 28"x52" for a Linus blanket.  I warped full width on the 32" (which is actually 31.5") with 96" of warp.  Draw seemed to be less than 1" either side, but off the loom it relaxed to 28.5" wide.  It was only 62" long and I used almost every inch of warp I had - loom waste was about 4" on the front (to the beginning of the hem) and less than 14" on the back.  Lessons in take up learned.  I also noticed that I beat the beginning less well than the end.  Apparently the threat of running out of warp with 2" to go is a good beating motivator. 

Still I am ridiculously pleased with it.  This simply couldn't be done on a harness loom.  There aren't enough harness nor treadles to control 80 independent blocks.

For my next trick, I'm going to work on a tutorial kit that will thoroughly teach Summer and Winter on the RH.  I'm still trying to figure out a good project, but I am leaning toward a tea towel sampler in 2/8 ground warp and weft with 4/8 pattern weft.  I want to have the kit with yarn, complete tutorial and sampler pattern put together in time for Twist, Fibrefest and the Guild Sale which means a lot of work between now and August...


Monday, 11 May 2015

My loom can do 4 shaft patterns, too


I keep getting asked when I'm going to get a 4-shaft or more loom, as if my RH looms are inadequate or limited.  Well, they do have some limitations, but not nearly the limits previously reported.   I have been experimenting with 4 shaft patterns using 2 heddles and 1 pick up stick permanently placed.  The front heddle controls the 1 threads, the slots control the 2 & 4 threads, the back heddle controls the 3 threads and the stick controls the 4 threads.  The limitation is that the 2 threads cannot be chosen independent of the 4 threads, but it turns out that with a bit of clever re-ordering of threads quite a lot of patterns work quite well.

I present the following examples of the new range:


On the left is a sample done in dishcloth cotton on 2 5 dpi heddles threaded at 5 epi.  The bottom half is waffle, the very bottom is beaten much to hard, far too many ppi.  Even properly beaten it's too loose at that sett.  The top half is Bumberet (I love that name, silly, but true), not so bad but the sett is still wrong.  It was enough to tell me I was on the right track, though, as the weaving sequence was easy and it worked.  On the right is the same thing on 2 7.5 dpi heddles threaded at 7.5 epi.  The beat is right throughout this one.  Much better, but the waffle floats are still a bit long for a Linus blanket.  The Bumberet will work for a Linus, though.

I didn't have enough width to try the Atwater-Bronson variation I wanted from Handwoven Jan/Feb 2015 on the dishcloth cotton so I tried a huck next.  Had to fiddle with the threading a bit to make it work in my system, but I'm quite pleased:

On the loom
Washed one side
Washed, the other side     


 I had quite a bit of warp left over from Judith's class so I started messing with that.  Without changing the threading I tried some Summer and Winter and a 3 shaft waffle:

This is 2/8 cotton warp and tabby weft with 4/8 pattern weft .  The waffle sample is 2/8 for both warp and weft.  Sett is 20epi for all.  Summer and Winter really doesn't show itself to full advantage on the loom. Here's what the other side looks like after washing:


Last, I rethreaded the Flip with doubled ends to try that Atwater Bronson Variation.  One of my limitations is the range of setts I can get, especially when I am using both heddles to control threadings that repeat on one heddle.  This one goes 1-3-1-3-1-2 for a bit which means that even with two heddles I can only sett it at the stated heddle dpi, in this case 10dpi.


I love it.  The green weft is 4/8 cotton, but I think I like the doubled weft better.  At this sett it would be great for a teatowel, but I am contemplating dress fabric.  Judith gave me a bit of 2/22 cottolin to sample with.  I think I will try it doubled in the 8dpi heddles. 


Stay tuned, more experiments to come.  Though maybe a little spinning first, as I have an article for Ply magazine due July 1st.


Saturday, 18 April 2015

Plain Weave Frivolities Acadian Style with Judith

Today was the Plain Weave workshop with Judith Rygiel.  Judith has a doctorate in history and did a major post doc study of Acadian Textiles several years ago.  This led her to studying Cajun textiles in Louisiana which she is still working on.  Today she had us try several traditional techniques based on simple plain weave.  I used my Rigid Heddle loom of course!  I warped it last Sunday with 2/8 cotton in two heddles for a sett of 20epi.

Here are my samples from today:

This is Cordons in Weft.  Pretty simple, you insert shots of a heavier weft as it strikes your fancy.  Often it was done white on white.

Cordons in Weft
 I am a geek, yes I am.  This is my iPad open to the Goodnotes notebook page where I took notes on the next sample:


The sample was "Twisted Weft" where you have two weft shots twisting around one another in the same shed.  It creates very interesting chevron effects, and you can use different weights of weft for different effects.  Nancy did one with a strand of 2/8 and a strand of 8/8 that was really neat.  The iPad means that maybe I'll be able to find my notes when I want them!  It also lets me take a picture and write right on the picture.  Here's the sample by itself (sorry it's rotated, the warp is running left to right):

Next was Boutonne.  For this one, heavier weft shots get picked up between warp threads and twisted into little loops.  Shots of the finer weft hold it in.  There is usually a pattern to the loop placement.  Judith showed us a blanket made in Quebec of wool with inlaid Boutonne in snowflake patterns.


Judith almost didn't include this, until we pleaded and she ran down to Eco Equitable and bought some cotton fabric so we could try it.  We were all very interested in Catalogne (Rags).  The left stripe is Twisted Catalogne - 2 rags twisted together in the shed, middle is alternating rag and 2/8 weft, right is just rag weft.  I like the middle and left ones best:  


Then we tried Cordons in warp and weft.  This meant adding heavier supplementary warp threads to the piece.  Traditionally this is most often white on white, but we decided to play with colours.  The raspberry and blue are 8/8, the 2 heavy natural are 16/8 mop cotton and at the far left is natural 8/8.  I wound the extra yarns on a pick up stick to hang off the back of the loom.  It worked okay for a short sample.  They started out pinned into the green section until the weft held them securely.  The last stripe is weft cordon with boutonne.


The 4 of us had a wonderful time today, thanks to Judith who is a patient and knowledgeable teacher.  I learned more than just plain weave variations.  In the middle of the Catalogne section I ran into some tangled warp threads (I have no idea how I managed that).  Sam came to my aid and was rewarded by the radiant heat of my sudden hot flash.  (Why do I not get hot flashes when it's cold?  Why must they wait until the temperature is just nice then sneak up and try to cook me AND my unsuspecting friends?)  When we had to break two of the threads Judith came and showed me how to repair them by pinning one end of a repair strand into the fabric and carefully tying the other end to the broken thread.

I still have a good bit of warp to work with.  Stay tuned.  I have some neat ideas to try.

Wednesday, 15 April 2015

Why a Rigid Heddle?

I am so full of ideas and inspiration.  And a good dash of stubborn determination.  The "floor loom weavers" keep shaking their heads and wondering why I am bothering figuring out how to make 3 and 4 and more shaft patterns work on the Rigid Heddle.  I have a few answers:

1.  Because I can.  Which is a very good answer, but doesn't quite reduce the crazy factor in their eyes.

2.  Because not everyone has the money and space for a floor loom or even a table loom.  My Ashford RH 32" fully kitted up with pairs of every size heddle and even a stand costs considerably less than even a 15" 4 harness table loom.  It can hang on a wall when not in use, even in use it takes less than a square yard of floor space.

3.  Because my simpler loom has a lot fewer parts to break or need maintenance.

4.  Because my largest RH loom weighs a lot less and is more portable than even a small table loom.  I have friends who can no longer carry a table loom but they can still manage a smaller RH.  I can carry my 32" RH with 2 fingers, my Cricket 10" fits in a shopping bag and I can lift that with 1 finger.

5.  Because the RH is better at some things than floor or table looms.  If I'm careful, I generally have less than 15" of loom waste; I'm a handspinner, remember, I can't stand loom waste.  The RH works at lower tensions, which makes it easier on some yarns.  And I can weave Summer and Winter tapestries which would require more shafts and many more treadles than any floor loom has.  Pick up sticks are a lot easier to use on my loom because it's easier to reach where they need to go.

6.  Because the RH has required that I begin to really understand the interlacement of threads.  The fell line is right under my nose, I really can't miss what's going on.  And I have to handle the heddles and the sticks in such a way that I am aware which threads are up and which are down.  Trying to figure out how to make things happen on my loom means I am learning a lot more about structure a lot faster than I would if I could simply follow a draft.

Yes, a floor loom would be faster for many of the things I'm contemplating.  But I am not trying to clothe my family nor make a living production weaving.  I am weaving because I enjoy the process.  And I am enjoying the challenge of figuring out how to make it work.  Even when it doesn't quite:

Waffle, on the wrong threading, oops 

The warp is white 2/8 cotton that I threaded in 2 10 dent heddles at 200% to get a sett of 20epi.  It's for Judith Rygiel's "Plain Weave Frivolities, Acadian Style!" workshop I'm taking on Saturday.  It occurred to me that this is the same threading I use for Summer and Winter (at half the density), so I could probably experiment a little beforehand.  I had a draft for a 4 shaft Waffle all figured out on iWeaveit that I was pretty sure would work with just the two heddles and 1 pick up stick.  So I tried it.  And wondered why it wasn't quite working out.  Oh.  Waffle needs a point twill threading; this is a straight draw threading (I am still somewhat astonished that I can say that and both understand it and mean it, only weavers talk like that).  Should maybe not get quite so excited quite so late at night...  Still, it looks really nice, with a really neat horizontal rib effect.  I think I'll do a bit more, just to see what happens when it comes off the loom and gets washed.  I'll keep working on it and let you know how it goes.


Tuesday, 7 April 2015

My Name is Elizabeth and I'm a Weaver

There, I said it.  I have resisted the appellation for years even though I have had rigid heddle looms for many years, I teach Intro to Rigid Heddle and I've had an inkle loom even longer.  I always saw myself as a capital "K" Knitter and a capital "S" Spinner but a small "w" weaver.  I wove a bit, but I didn't "think in weaving" like I do knitting and spinning.  Somehow, in the last little while that has changed.

It started with this:

Elephant blanket, border almost complete


That would be a blanket in Summer and Winter.  On a Rigid Heddle Loom.  Because I can do tapestry in Summer and Winter with just 2 heddles and a pickup stick. 

I did a bit of it based on an article in the first issue of Prairie Wool Companion (Nov 1981) about 6 years ago.  I made some little "First Aid Kit for Hearts" bags for some kids I was working with


I also made a sampler of many of the possible textures based on the weave structure.  It was supposed to result in an article for WeaveZine, but the on-line magazine ceased publishing before I got it done.

Finally I produced a baby blanket for a friend's first baby:


The Multi-harness weavers collective jaws dropped when I presented this at Show and Tell.  Even their fancy computer controlled 32 harness looms probably don't have enough harnesses to create this. 

And then I let it go for a while.  I didn't produce much, I just taught the intro course.

But then, in January, there was a message from a friend.  Her brand new grandbaby was in hospital and they had run out of suitable Linus blankets for baby boys.  Linus blankets are given to patients at CHEO to brighten rooms and provide comfort.  They had plenty of knitted ones, but they had decided those are not suitable for babies; some babies have caught fingers in the stitches and nearly been injured.  Ann's message was "can't we weave these?"  Of course we can.  So out came the loom and a sense of adventure.  In the process I discovered that the loom might be low tech, but I'm not.  I found a needlework graphing app for my new iPad which set up the graph (StitchSketch).  And I'm using another app to track my place (Knit Companion). 

In the end the elephants blanket might stay with me, as I think it will turn out a bit small, but I have a PILE of other ideas.  So much so that I bought another app.  iWeaveIt is the iPad version of WeaveIt.  It's a drafting program for weaving.  And I really like it, I like figuring out what thread does what.  Which, I think, makes me a Weaver with a capital W. 

Stay tuned.  I have plans.  This loom can do a LOT more than scarves and plain weave and I intend to explore and share.  There will be kits and tutorials.  IF I can keep at it, a tutorial and project kit for Summer and Winter will be ready in time for Twist in late August.


Thursday, 8 August 2013

Dyed Fibre Should be WYSIWYG - Part 2

And sometimes, it is.  When I designed my "Fractal Rovings" I wanted something that was more WYSIWYG and could be spun into a predictable yarn.  Self-striping yarns were just coming in and I wanted to spin some.  I had also read a really neat article in Spin-Off on Fractal Spinning.  But the Corriedale roving I had was narrow, which made splitting more challenging, you can split it in quarters but then you pretty much have to spin fingering weight.  I had a think, and did some sampling.  In the end I began making pairs of rovings, one with long stripes and one with short stripes.

Lets look at how these are different from the commercial roving I sampled in the last post.  This is "Old Country".  At the top of the picture is the "long stripe" roving.  Each stripe is about 2 feet long.  At the bottom is a sample of the fibre, it's about 4" long.  In the middle is the short stripe.  Each short stripe is about 6" long.


Here's what they look like lightly twisted together:


 So what might this roving look like as yarn?  Looking closely at both rovings we notice that the colour isn't perfectly even in any of the stripes, so we know that within each section the colour is going to be heathered.  The short stripes are about 1-1/2 times the fibre length so we know we will get sections of yarn that look pretty much like each stripe.  The stripes blend into each other so we know there will be sections where the yarn does that too.  If you spin both and then ply them together there should be long stripes of one colour with shorter stripes of all the colours moving along it's length much like the roving:


And there are definite stripes.  And it looks a lot like the original roving.  Each long stripe of colour has 8 short stripes of colour along it's length.  At some points the colours match up to nearly a solid, at others the contrast is more striking.  The value range is fairly narrow so that even the colours that are farthest apart don't clash.  And the colours themselves are all closely related so they play nicely together.  The yarn appears a bit darker than the roving as is usually the case.  I think it's because spinning compresses the fibres together creating a smaller surface area which allows less light to reflect back.  The yarn is also a bit more muted as should be expected with the colours blending together.

Because I have sampled and played with Fractal Rovings a lot, and so have many of my fibre friends, I can tell you that if you split the short stripe into quarters lengthwise and the long stripe in half then spin a mid fingering weight 2 ply yarn when you knit an average sock each of those short stripes will last for 1 to 2 rounds and each long stripe lasts about 12-16 rounds.  But you don't have to split it that way and you don't have to make fingering weight.  There are lots of ways to split and combine the plies to make different stripe lengths.  The heavier the yarn the shorter the stripes will be.  But this roving will stripe pretty much no matter what you do.

In part 3 we will sum up what the two rovings have taught us about looking at handpainted fibre so we can make more informed choices.

Tuesday, 6 August 2013

Dyed Fibre Should be WYSIWYG Too - Part 1

Except that it very often isn't.  And I often have beginning spinners come to me saying "What did I do wrong?  It doesn't look anything like the roving."  Truth is they did nothing wrong.  Some dyed fibre can't be made into yarn that looks anything like the original fibre.  My friend, OVFA, gave me a very good example of this for Christmas one year.  It's from a large, well known commercial supplier.  It's labelled 100% wool top.

The top is narrow, which is perfectly fine, but look at the length of the stripes compared to the length of the fibre.  The fibre is nearly 5" long.  Many of the stripes are less than 2".  The sample of fibres I pulled out to measure length actually has 3 colours on it.

What this means is, no matter what I do, short of twisting without drafting at all, is that the colours are going to blend.  A lot.  When you draft the fibres don't stay lined up, they move around.  And that pink and green that look striking on the roving?  They are going to go grey and possibly muddy.  Here's some samples spun up to about fingering weight:

1.  The roving spun as is and plied back on itself.  Pretty muddy and blended.  Overall the effect is much darker than the original roving, though there are some flashes of the original colours

2.  The roving split in half and the halves matched, more or less, in plying.  Better but doesn't look like the roving. Over the whole roving it would be very difficult to keep things matched up, even over the small amount I did I was off by a nearly a foot.


3.  A chain ply from a singles spun from the full width of the roving.   Usually makes for clearer stripes, but not when the stripes are so short.  Much of this one blended in the plying with all 3 colours even when I chained really short (2-3") sections.  There are some sections with 2 plies of one colour and even the odd one with more or less one colour but not many.


4.  The singles.  Pretty blended, but some clear stripes.  You can see barberpolling even in the singles.


In fact, there is nothing wrong with any of these, they just don't look anything like the roving.  When I look at the roving the overall impression I get is "green with stripes", but the yarns say "dark blue with spots".  As yarn this fibre becomes an interesting heather with occasional flashes of fairly pure colour from the occasional spots that are at least as long as the fibre length.  The colour and value choices are such that there is nothing clashing about them.  Rovings like this do make it quite a bit more difficult to judge what the finished yarn could look like.  Even with experience it's a bit of guess until you sample.  When the colour and value choices are less careful they can end up as what I (not so fondly) refer to as "clown vomit".  "Rainbow" rovings that have shortish stripes of colours from across the rainbow with wide variation in value have a tendency towards this.  They don't end up looking like rainbows at all.  When values are very similar in these rainbows you can end up with muddy greys.

So how do you know what that marvelous handpaint you are holding is likely to look like when you stop admiring it and actually spin it?  Next post we will look at a hand-dyed roving that is meant to be WYSIWYG.  Then we will consider what we can learn from both rovings that will help us make more informed choices at the next fibre festival.